Showing posts with label cooking. Show all posts

Thursday, February 27, 2014

Snack Duty | Valentine's Day

Should have posted this over a week ago, but, well, sickies in the house needed love and snuggles more than Valentines needed to be blogged.
Last year we had preschool snack duty once a month. A box of graham crackers, some fruit, and a gallon of water and all was well. If my day happened to fall near a holiday, I'd do something special; if not, crackers it was. This year we have been assigned snack week. A whole week of snacks a few times a year. No big deal. Our first week was Halloween week so for four days I did Halloween-related snacks (I take no credit for these ideas, though I'm pretty proud they actually turned out. Those spider webs were no easy feat.):
So after Halloween I thought I was in the clear. Except a couple of weeks ago Miss Denise informed me she had switched one of my no-big-deal weeks in May for Valentine's week because, well, "I just can't wait to see what you'll come up with!" seriously? That's what I get, I suppose. My only saving grace was the short week due to a holiday on Monday and the fact that Anderson doesn't attend on Friday. There was also a pre-planned pancake day to celebrate "P" week so I only had 2 actual days of "creative" snack duty. I still didn't need the pressure, however. It's not as if I don't already have a full time job. And another kid. And a problem with eating all of the treats that I make. But I did manage to pull a couple of heart-shaped things together for school, the t-ball team, and some friends:
(melon pops, cinnamon rolls, blueberry muffins, brownies, pink heart rice krispie treats)

Monday, April 29, 2013

A little treat

Anderson loves banana bread and his been asking for it every time we pass a Starbucks lately. Clearly we have made too many runs through the drive-thru. I have made 3 different recipes in the past week to satiate the boy. The first recipe was good, and really easy, but a bit of a one-note. The second was  a Trader Joe's box mix which, despite my love for most all TJ's box mix desserts oh how I would love a pan of truffle brownies right now was terrible. Really terrible. Thank goodness those muffins went to Anderson's class for snack day because yuck. Obviously 4-year-olds will eat anything they perceive to be a cupcake. So finally I made the one I set out to make in the first place, only to find last week that I didn't have enough rotting bananas to make the recipe. Who just happens to have at least 6 over-ripe bananas lying around? Anyway, I bought the bananas, left them on the counter all week and baked this recipe up. It's very good. Not omigod amazing, but very good. I substituted creme fraiche with sour cream because, come on, who happens to have that just hanging out in the fridge and I also used almonds instead of walnuts because they are a superior nut in every way. The recipe is huge and apparently makes two loaves though I only have one large loaf pan and ended up with 1 full loaf, 2 small loaves, 6 cupcakes and extra batter that went down the drain. Needless to say we'll be sharing the banana love tomorrow, starting with Anderson's teacher. Because teachers never receive enough random treats to thank them for all they do and, well, Mrs. Berry is pretty much the best.

*Odd note: I have never ataully eaten a banaa in my whole life. I find them repulsive. I won't even let one slip in a smoothie. Yet, oddly, I really enjoy banana bread. Go figure.

Monday, November 5, 2012

Pumpkin Cookies

I know it exists- that perfect combination of oatmeal, pumpkin, and chocolate chips all wrapped up in a sufficiently dense, perfectly puffed and slightly crunchy, yet not-too-sweet cookie; I just have yet to find it. So far I've tried two recipes and, while good, they just aren't it. As a matter of fact, I cannot remember the last time I actually threw a couple of cookies away because they didn't get eaten; not because they were bad, they just weren't good enough to justify the calories. The first was too moist and flat and the second (in the pictures), while better, was just not as dense as I had hoped for. Later this week I am going to take matters into my own hands and try modifying my own chocolate chip recipe to see if it yields better results. Because there is nothing wrong with trying out cookie recipes until you get right. Baby Beck clearly agrees.

Tuesday, October 30, 2012

Snack Day

I have snack duty once a month for Anderson's class and, while I do not intend to make a big deal out of it most of the time, I am kind of excited when it falls near a holiday so I can do something more fun than the regular graham crackers or pretzels. Between the peanut allergies, the "nothing in wrappers" policy, and the fact that there are 12 finicky 3 year olds to nourish, being creative can be far more trouble than it is worth. Last time I made these ridiculously easy but so cute monster pudding cups I saw on Pinterest and the kids loved them. Anderson told his teacher they were "spooky snacks" because he is just too cute like that.

Monday, October 29, 2012

Treat


Friday a couple of girlfriends came over for a little Halloween treat-making party. The kids played and we wrapped, stuffed, and assembled cupcakes, mummy candy bars and Halloween Peeps s'mores for the kids' friends and teachers. The whole divide-and-conquer method was key and a December craft day is already in the planning stages. Aside from the cupcakes, which were intended for our own kids and neighbors, I chose treats that could be assembled ahead of time and passed out this Wednesday at school. The cupcakes were my own idea (though not very original as there was actually a picture of something similar on the box of licorice I bought, ha!), but everything else was from Pinterest, of course. As fun a night as we had and as much as the kids loved everything we made, my favorite part of the night had to be the perhaps wine-induced impromptu adult monster cupcake decorating contest that ensued when we ran out of spider legs. Sadly my own husband, and highly under-qualified, but equally cute official judge, ranked my squiggle mouth monster as only second place. Clearly the libations had clouded his judgement.

Sunday, August 12, 2012

Lemon, lemon | Lemon-glazed shortbread cookies and fresh-squeezed lemonade

It's been hot here. Very hot. The kind of hot where all you can think about is jumping in the pool or getting in the car just so you can be in the air conditioning; the kind of hot where chocolate doesn't even sound appealing. Did I just say that? Fortunately there is a lemon tree over-loaded with fruit from which to pick as many lemons as I can fit in a grocery sack. And so afternoons are spent concocting nearly too tart treats in the hopes that they will take our mind off the heat and give just enough of a hint of sweet to get us through the rest of the day and the oh-so-warm nights. Recently it was lemon bars, but yesterday it was lemon shortbread cookies and, today, fresh-squeezed lemonade. Because Anderson declared that "yeah, mommy, we have to make lemonade with Grandma's lemons because it's summer. In the summer you drink lemonade". Yo Gabba Gabba has taught him well.


Lemon-glazed Shortbread Cookies
I am in love with the lemon cookies sold at Champagne Bakery. Much to my surprise I couldn't find a knock-off recipe so I decided to make my own. Unfortunately I chose to make them on a hot day and had a bit of a struggle with my dough sticking to the too warm counter. Fortunately Gabe and I aren't picky about the shape of our cookies and ate all of the reject rectangles and odd shapes first.

recipe adapted from the Barefoot Contessa whom I love almost as much as these cookies

Ingredients
  • 3/4 pound unsalted butter, at room temperature
  • 1 cup granulated sugar
  • 1/2 teaspoon pure vanilla extract
  • zest from 2 lemons
  • 3 1/2 cups all-purpose flour
  • 1/4 teaspoon kosher salt
  • juice of two lemons
  • 1-2 cups powdered sugar
Directions
Preheat oven to 350 degrees.

In an electric mixer mix the butter and granulated sugar until just combined and add the vanilla and the lemon zest. Mix until just incorporated.

In a separate bowl sift together the flour and salt and add them to the butter mixture. Mix on low until the dough starts to come together. On a floured surface press the dough together to form a flat disk. Cover with plastic wrap and refrigerate for at least a half an hour. Note: the hotter it is and the softer your butter is, the longer you will need to refrigerate. I put mine in the freezer for about ten minutes for it to firm up because the refrigerator just wasn't doing the trick.

Turn the dough out onto a floured surface and roll out to 1/4 inch thick. Cut out with a cookie cutter  and place on an ungreased cookie sheet or silpat mat. Bake about 20 minutes until edges begin to brown. Allow to cool completely on a wire rack.

For the glaze, whisk together the lemon juice and powdered sugar to desired consistency. The more powdered sugar you add, the thicker and firmer the glaze will be. You really have to eyeball this one and taste. I prefer a more tart glaze so I hold off a bit on the powdered sugar.


Fresh-squeezed lemonade
Surely nobody needs directions for this, but here goes. Seriously the easiest and most satisfying recipe. You can make a glass or a pitcher, it's all about proportions.

Ingredients
  • lemons (for a pitcher I used 9 super juicy lemons)
  • water
  • sugar
Directions
Squeeze the lemons and strain the juice to remove any pith or seeds. Add it to the pitcher and add water. My ratio is about 1 part lemon to 3 parts water. I always am careful with adding the water because it is much easier to add more water than it is to add more lemons once you've squeezed them all! Stir in enough sugar to make it as tart or as sweet as you like. Pour in a glass with ice and enjoy summer.


Friday, July 27, 2012

The Very Best Lemon Bars

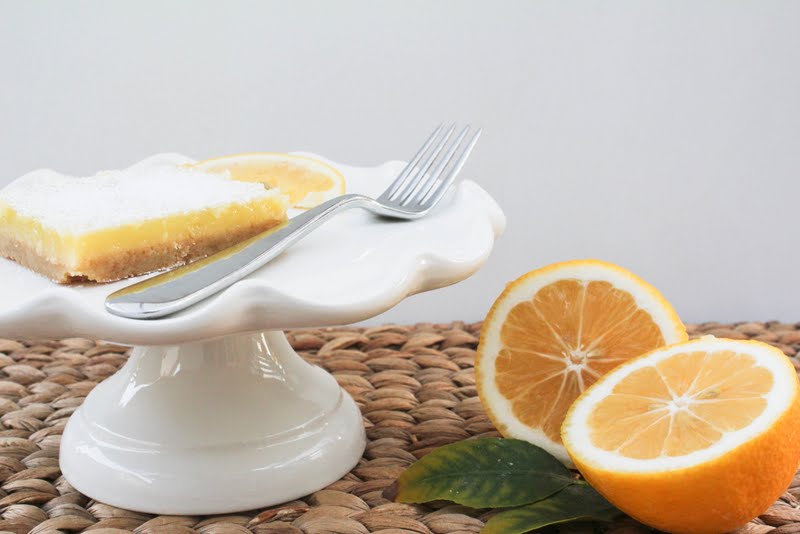
Having just picked a ton of lemons and having an incredible summer sweet tooth I made my favorite lemon bars a few days ago. Oh, how I love lemon bars. And I love how incredibly easy they are to make. I did, however, forget that the recipe makes a 9x13 pan until I had already begun and therefore had to consume a mass quantity of them all by myself (seems not everybody shares my affinity for puckery shortbread desserts). Sadly I have the canker sore to prove it. Totally worth it.

Lemon Bars
recipe from Gourmet magazine, 1999
Ingredients for the shortbread
  • 3/4 cup unsalted butter
  • 2 cups flour
  • 1/2 cup packed light brown sugar
  • 1/2 teaspoon salt
Ingredients for the lemon topping
  • 4 eggs
  • 1 1/2 cups granulated sugar
  • 3/4 cup fresh lemon juice
  • 1/3 cup all purpose flour
  • powdered sugar for sprinkling on top
Directions
For the shortbread:
Preheat oven to 350 degrees F.

Cut butter into 1/2 inch pieces and pulse with all other ingredients in a food processor until the mixture forms small lumps. Sprinkle into a 13x9 inch pan and press evenly onto the bottom. Bake in the middle of the oven until golden, about 20 minutes. While baking, prepare the topping.

For the topping:
In a bowl whisk together eggs and sugar until combined well and stir in lemon juice and flour. Pour over hot shortbread base. Reduce oven temperature to 300 degrees F. and bake in the middle of the oven until set, about 30 minutes. Cool completely in the pan and cut into squares. Sprinkle with powdered sugar before serving. Store in the refrigerator.

Thursday, May 24, 2012

Spicy Quinoa and Black Bean Burritos

Funny. I grew up in a house where everything either went inside of or was served with a tortilla, yet I don't once remember having burritos as a meal. Maybe in New Mexican cooking burritos are more just what you do, not what you intentionally make. In any event I now make burritos when I can think of nothing else to make for dinner. They are easy, they are fast, and I don't have to go to the grocery to make them because we can fill them with whatever we already have.

I found this recipe on Pinterest and it was a keeper from the first time I made it. This last time, however, I wanted to make them a bit healthier (enter the quinoa) and use what I had on hand (jalapeño refried beans and arugula). So, so good. Unfortunately this photo does them absolutely no justice. And where did the tomatoes go? Hmm...had I not been so hungry and eaten them about a quarter of a second after I took this, perhaps I could have been a bit more mindful of how they looked in the photo. Whatever.

Spicy Quinoa and Black Bean Burritos
adapted from this recipe on Annie's Eats
Every single bit of this recipe can be modified according to what and how much you have on hand. Taste as you go and add/alter as needed.

      Ingredients
  • 1 tablespoon cooking oil (vegetable, canola, etc.)
  • 3 cloves garlic, minced or chopped finely
  • 1 teaspoon chili powder
  • 2 teaspoons cumin
  • 1 can black beans, rinsed and drained
  • 1 can refried beans (I used the "zesty salsa" flavor)
  • 1/4 cup water
  • 1 cup cooked quinoa
  • 4 tablespoons prepared salsa (more if you like, none if the spice is already sufficient)
  • tortillas
  • arugula
  • tomatoes
  • sour cream
  • grated cheddar cheese
     Directions
  1. Sautee the garlic, cumin, and chili powder in the oil over medium-high heat heat for about a minute. Add the beans and the water. Simmer for a couple of minutes until the mixture becomes well combined. Add the quinoa and the salsa.
  2. Heat the tortillas, spread the filling, add your toppings, and roll. So easy.
As I mentioned before, the original recipe is really, really good. And maybe because it is so good I was able to easily modify it according to what I had on hand. I even made a non-spicy, all black bean and quinoa version for the kids. See what I mean?

Wednesday, May 23, 2012

Oatmeal-Chocolate Chip Cookies with Almonds and Sea Salt

I decided to modify one of my favorite cookie recipes and the end result was pretty fantastic. But maybe they need a shorter name? I have never made this recipe exactly as written and it has always been forgiving. This time I omitted the raisins, coconut, and walnuts and added toasted almonds and sea salt. Two of my favorite things. Yum. I should have doubled the recipe and frozen half so I could be enjoying one right now. Or maybe its best that I didn't. In any event, my favorite sous-chef was by my side making sure beaters were clean and and the dry ingredients were perfectly measured.

Oatmeal-Chocolate Chip Cookies with Almonds and Sea Salt
modified from Martha Stewart
These are not a light, moist, cakey cookie. They are dense and  fabulous and super easy to make.
Ingredients
  • 1 cup unsalted butter, softened slightly
  • 1/2 cup sugar
  • 1/2 cup firmly packed brown sugar
  • 2 eggs
  • 1 teaspoon vanilla extract
  • 2 cups flour
  • 1 teaspoon baking soda
  • 1/2 teaspoon baking powder
  • 1/2 teaspoon salt
  • 2 cups old-fashioned rolled oats
  • 1 bag semi-sweet chocolate chips
  • 1 cup roasted almonds (I used sliced)
  • course-ground sea salt for topping the cookies
Directions
  1. Preheat oven to 350 degrees. Line baking sheets with Silpat mats.
  2. In a mixer, beat butter, sugar and brown sugar together until smooth and creamy, about 2 minutes. Beat in eggs, one at a time, until well blended. Stir in vanilla.
  3. In a separate bowl, sift together flour, baking soda, baking powder and salt. Gradually stir into butter mixture until well blended. Add oats, chocolate chips, and almonds and mix on slow speed until well blended, scraping the sides of the bowl. 
  4. Refrigerate for about 15 minutes. I find that refrigerating the dough is the key to cookies that don't spread when you bake them. It's a personal preference when making chocolate chip cookies and is certainly not necessary.
  5. Form dough into balls about 11/2-2 inches in diameter. Place on Silpat about 2 inches apart and press gently on the top of each one with the palm of your hand. Sprinkle each one with sea salt. Add an almond to the top if you want them to look fancy. Bake until golden, about 16 minutes. Cool on pan for 2 minutes. Remove from pan, and finish cooling completely on wire rack.
  6. Try not to eat them all in 2 days like we did.
     Yields about 4 dozen small cookies.
     *This dough refrigerates and freezes really well for ready-to-bake cookies.

Wednesday, May 2, 2012

Pancakes

We made pancakes on Saturday. We don't do it very often, but we should.

Monday, April 23, 2012

Coffee Cake

Every year I give up sweets for Lent and every year I break the fast on Easter morning with my mom's coffee cake. Which, in fact, is a recipe from her mom. This year was no exception, but when I was asked to bring a birthday cake for a morning celebration at work I decided it was my turn to make the single best coffee cake you'll ever taste. That's an official title. I declare it to be so.

There is something I love about following recipes hand-written from my mom and grandma. My grandma passed away years ago, but there is something I find so comforting in leafing through the giant cardboard box of recipes penned in her own hand. Every time I see the word "oleo" in her penmanship (which is remarkably similar to my mom's and, at times, my own) I miss her just a little bit more.


Grandma Day's Coffee Cake
This makes a double recipe. To half it, cut the ingredient quantities in half and bake in an 8x8 or 9x9 pan and vary baking time accordingly, checking after about 30 minutes.

for the cake:
1/2 cup butter
2 cups sugar
4 eggs
1 cup milk
3 cups flour
4 teaspoons baking powder
2 teaspoons salt

for the topping:
2 cups pecans, chopped
4 tablespoons butter, melted
4 tablespoons flour
2 cups brown sugar
2-4 teaspoons cinnamon, depending on how cinnamon-y you like it

Preheat oven to 350 degrees and generously butter a 10.5x15.5 pan. (I have not made this in a 9x13, though I am sure it would be fine.)

Cream butter, sugar and eggs in a mixer and add milk. Incorporate flour, baking powder and salt, mixing until well combined. Set aside.

For topping, mix all ingredients together in a large bowl until well combined.

Pour half of the cake batter into the pan, spreading with a rubber spatula as necessary (it will be thick). Sprinkle about half the topping in an even layer. Pour remaining batter on top and be careful to spread out as well as possible. This is hard to do because of the topping. It will seem as if there is not enough, but it will spread as it bakes, so just cover it as well as possible.  Cover with the remaining topping mixture and bake for about 40 minutes or until a toothpick comes out clean.


Thursday, March 29, 2012

Cake

Mom's birthday was last week and Sarah made this:
I don't generally even like any cake that's not lemon or chocolate, but I am still thinking about this one. Maybe it's because I haven't had sweets since Lent began, but I think really it's just because it was that good.

Wednesday, March 28, 2012

Dinner | macaroni and cheese

Rare in this house that there is ONE version of ONE meal that everyone in this house will eat. The baby is still working on chewing solids, the toddler would be content to eat chicken, broccoli and carrots every single night of the week, the vegetarian, well, he's a not-so-vegetable-loving vegetarian, and the cook (that's me) will eat just about anything and always makes at least 2 variations of any one dish.

I've gotten very good at coming up with quick ways to alter most things into a vegetarian version using a variety of "fake" meat products and vegetables, but I really just love when I can make one thing with no changes and no extra pots and pans. Macaroni and cheese the way my dad used to make it is a staple that makes it into the rotation about every other week.

I've made a lot of macaroni and cheese recipes, but this one that really has no recipe at all is one of my favorites. Everything my dad cooks is my favorite, really. No rue, no making a cheese sauce, no spending $20 to make mac and cheese. Just layering tons of cheese, tomatoes, macaroni, and onion in a pan. Easy. And I suppose you could add a salad or sprinkle in some broccoli, but why do people always try to ruin intentionally non-healthy recipes with all of that healthy stuff. I guess I'm a purist.

Macaroni and Cheese with Tomatoes
There are no set measurements for this. Everything is "to taste". It can be prepared in any size baking dish, or even in a single layer on a cookie sheet if you like the macaroni extra crunchy. We eat a ton of it, so this recipe makes a large casserole which would feed probably at least 6 civilized humans.

1 pound macaroni, cooked and drained according to package (make sure to add lots of salt to the water)
1/2 onion, diced finely
garlic powder / granulated garlic (not garlic salt, that's totally different)
1 lb. cheese, grated (probably won't need all of it, but the more, the better)
1 14 oz. can crushed or diced tomatoes (both are good, just depends on how you like it and which one you have in the cupboard)
1 small can tomato sauce
small pats of butter
salt and pepper (lots!)

Preheat oven to 425.
In a large casserole pan, sprinkle a few pieces of butter, followed by a layer of macaroni. Sprinkle liberally with salt, pepper, and garlic. Sprinkle onions on top. Drizzle tomato sauce and tomatoes and cover the entire layer with cheese. Repeat until the pan is full. Throw it in the oven for about 45 minutes or until crispy on the edges and all melted inside. The longer you cook it, the deeper the tomato flavor becomes, which is most definitely a good thing.

Thursday, March 8, 2012

Homemade

As I prepared carrots for Baby Beck tonight it hit me that this may very well be the last time I make a large batch of baby food. Who knows if I will have another a baby and Beck is eating nearly all finger foods these days. (Carrots are the last of the purees as they make me the most fearful of choking.) I have had two babies to feed now and am proud to say I have not once purchased a jar, a little tub, nor a pouch of pre-made food for either one. OK, I do buy the squeezy things of apple sauce, but that is simply because Anderson thinks they are so much fun.

It's not that I have anything against store-bought baby food, it's just that I could never personally justify the expense (I mean, a pound of organic carrots at Trader Joe's only costs 79 cents. Yes, the fancy organic ones. That's a lot of premade pouches of carrots for a fraction of the cost) nor the not-entirely-natural color of those pre-packaged baby foods. Because even the organic, all natural, super expensive carrots are strangely dark in color compared to the ones I just pulled off the stove.

I don't know that I ever intended to make all of the food for both of the boys, but it just became the way I did things. I made it every two weeks or so and suppllemented with finger foods as it became easier to do so. I never worried about "stages" or readiness for certain foods and they transitioned from purees to solids without issue as I offered both at the earliest signs of them being ready.

With Baby Beck it seems like I have hardly spent any time at all in the kitchen peeling, steaming, and mashing (maybe I have just become more efficient). It's just one more sign of how fast he is growing up. Who knows if, in the long run, it makes any difference at all that I chosen to make food as opposed to buy it in the baby aisle. I'm sure it probably doesn't. And surely it doesn't make me any better than evry other mom out there who buys their baby food. But I have a toddler who requests spinach as a snack and who recently pushed aside a cupcake to eat carrots, so I have to believe there must be something to being raised on food that looks, smells, feels, and tastes the way it should.
 Wow are those are some seriously bright carrots!

Monday, February 6, 2012

Chili night

I am no way ready to enter a chili cook off, but I was pretty pleased with my first ever batch of chili. Made in the Crock Pot, no less. And vegetarian! Seriously, being married to a vegetarian has proven to be beyond frustrating at times, but I am getting better at altering what I know and love to accommodate my meatless better half. Though I did comment during dinner that this would be even better made with meat, I didn't miss it. Now, the fact that Gabe will go on to add veggie crumbles to it tomorrow to make his a "fake-meat meat version" does annoy me a bit as I do not have the luxury of just pouring some defrosted crumbled protein mass into my leftovers. Can't win them all.

Vegetarian Crock Pot Chili
1 1/2 large onions, chopped
3/4 green bell pepper, chopped
4 garlic cloves, minced
1 can each black beans, pinto beans, and kidney beans, drained and rinsed
1 28 oz crushed tomatoes
1/2-3/4 small can tomato paste
1 chipotle pepper in adobo, chopped
3 T chili powder
1 1/2 T cumin
1/2 t oregano
1 cup water
salt and pepper
grated cheddar cheese for garnish

Sautee onions, bell pepper, and garlic in olive oil until soft. Add to crock pot with remaining ingredients, stir and set on low for 6-8 hours.
Recipe adapted from this one from The Lazy Vegetarian.

Monday, July 25, 2011

If I had an extra $100...

Today I would have bought these:
And 6 of these:

Eat: Lemon-Almond Souffle

We had Scott over for a little birthday dinner last night and although I was craving chocolate cake, I didn't trust myself with the leftovers. Have I mentioned I think I may have a tape worm that is making me insatiable? Anyway, I made these instead.
Pretty easy and quite good. Though tonight I am really wishing there was some leftover cake in the kitchen. I had to make do with a bittersweet chocolate almond bar instead.

Wednesday, July 20, 2011

Eat: Grilled BCAT (bacon, cheddar, arugula, and tomato) with pan-seared corn on the cob, & grilled asparagus

Tonight I almost lost it. Crying, er, make that screaming, baby and cooking were cause for a near meltdown. Add to that a raging barbecue and a frying pan of bacon and it's a wonder I made it through with only water and not a margarita. Why is it that in this house 4:45 marks the beginning of the witching hour? The hellish hour when everyone needs mama and mama just needs fifteen minutes to get dinner going. FIFTEEN minutes! Is that really too much to ask? Apparently so because instead it takes me over an hour to make even the simplest meal fit for human consumption. And did I mention that I'm married to a vegetarian? A very picky vegetarian? But I digress. This post is about what finally made it to the table, and not so much about the amount of patience, shhhhshing, and naughty words it took to get there.

Grilled BCAT
Let me start by saying I just threw this together because I happen to have an abundance of arugula (from last night's dinner) and tomatoes that are on overdrive in the garden right now. It basically is just a slightly snooty BLT. And for the vegetarian husband, I modified and made just a CAT. Hehe.

cracked wheat sourdough bread (Or just plain old sourdough, or any other bread for that matter. I just used what I had, as pretentious sounding as it is. Heck, you could use Wonder white and it would be just as good.)
olive oil (for brushing on the bread)
bacon (I am embarrassed to admit how many slices, but you go ahead and use as many as you'd like)
arugula
cheddar cheese, sliced
fresh tomatoes
dijon mustard (I didn't actually use the dijon, but I would have had there not been a screaming baby in my arms)

Prepare the bacon and set aside. Grill up the bread (brush olive oil on both sides first). Ultimately you want both sides grilled so grill a side and then flip it before continuing. Add the cheese to one slice of the bread and let it get melty. The add the bacon, tomato and arugula. Spread the mustard on the other slice and assemble. Yummy, melty goodness awaits.

Pan-seared corn on the cob
This is a variation on a recipe from Parents magazine of all places. I say a variation because I really don't like to measure stuff. 

olive oil
3-4 ears of corn
1 t cider vinegar
3T water
2 cloves minced garlic
pat of butter
chopped parsley (a pinch? a tablespoon? use however much you like)
salt + pepper

In a large saute pan on medium-high heat, heat the olive oil and add the corn. Sear corn on all sides until it gets some color (about 5 minutes). Meanwhile combine the vinegar and water. Reduce heat to medium and add the butter and garlic to the pan and saute for about 10-20 seconds, just to take away the raw taste of the garlic. Add the water/vinegar mixture and cover. Cook about 3-4 minutes more. Add the parsley, salt and pepper and you're good to go.

Grilled Asparagus with Balsamic and Parmesan
I think the title is pretty self explanatory, but if not, here goes.

asparagus (I like the super thin kind)
olive oil
balsamic vinegar (Preferably a good one that is slightly sweet and syrupy. Fini is what I like because it doesn't break the bank)
parmesan (The real stuff really makes it better. You know, like the kind that comes in a wedge, not in a bag.)
salt + pepper

Heat your grill to a low flame. Trim the ends of the asparagus and drizzle with olive oil. Throw them on the grill and watch them and turn them until they are to your desired done-ness. This totally depends on how thick the asparagus is. For the pencil-thin kind that I used it only takes a couple of minutes ion a very low flame. When they are ready, drizzle with balsamic, sprinkle with salt and pepper and parmesan shavings. Easy peasy.

Tuesday, July 19, 2011

Eat: Simplest Summer Salad Ever

After eating my way through a five day trip to New Mexico, salad wasn't a choice so much as a desperate attempt to stop expanding. This is the easiest salad I know. No cooking, no heating, one bowl, easy clean-up, and easy to modify according to what's on hand. Not to mention I was able to use some of my tomatoes that went crazy in the garden while I was gone.
Lentil and Brown Rice Salad
I based this off of a recipe given to me from a friend of mine last summer, his version used different herbs, but I had to go with what is currently growing in the garden. My sister-in-law makes a slightly different and warm version using all pre-prepared ingredients from Trader Joe's. Either way, it's fool-proof.

2 cups cooked brown rice (I make my own in the rice cooker, but you could just as easily use the pre-cooked kind)
2 cups prepared lentils (I use TJ's)
3/4 c diced tomatoes or grape tomatoes (I use both because I have both growing, but it makes no difference)
2 T chopped chives (parsley would be good, too!)
2 cloves garlic, minced
2-3 T red wine vinegar
3-5 T olive oil
juice from 1/2 of a juicy lemon or a whole one if not so juicy
salt to taste
arugula

Dump everything but the arugula in a bowl and mix. Seriously, that easy. Add more of whatever to taste. Adjust the olive oil to combine the ingredients and use as little or as much acid as you like. Serve over arugula. You could also use it as a side dish or heat it if you prefer. See, I told you it was easy!